As a Mac user, you might want to connect your computer to a bigger screen, like a TV. This lets you enjoy a bigger viewing experience. Whether you want to mirror your Mac’s screen, extend your workspace, or share content with others, connecting your Mac to a TV is easy. In this guide, I’ll show you how to connect your Mac and TV smoothly.
Key Takeaways
- Understand the different connection options available for linking your Mac to a TV, including HDMI, Thunderbolt, and Mini DisplayPort.
- Learn how to properly configure your Mac and TV settings to ensure a successful connection and optimal display quality.
- Discover the benefits of mirroring or extending your Mac’s display to a larger screen, allowing you to work more efficiently or enjoy multimedia content on a grander scale.
- Explore the options for connecting your Mac to a smart TV, including wireless screen mirroring, to eliminate the need for physical cables.
- Familiarize yourself with common troubleshooting steps to address any connection issues that may arise.
How to Connect a Mac to a TV: Step-by-Step Guide
Connecting your Mac to a TV opens up new possibilities. You can share content on a bigger screen or change your home entertainment setup. This guide will show you how to connect your Mac and TV easily.
You’ll need a few things to start: a compatible cable, your Mac, and the TV you want to connect to. With these items ready, follow these easy steps:
- Find the ports on your Mac and TV. You might see HDMI, Thunderbolt, or Mini DisplayPort.
- Pick the right cable for your devices. For example, if your Mac has Thunderbolt and your TV has HDMI, you need a Thunderbolt-to-HDMI adapter.
- Plug one end of the cable into your Mac and the other into your TV.
- Turn on your Mac and TV. Make sure they’re set to the right input. You might need to press a button on your TV remote or go through the on-screen menu.
- Adjust your Mac’s display settings to get the best image quality and resolution for your TV.
Once you’ve made the physical connection, you can mirror your Mac’s screen or extend it to multiple screens. These simple steps will help you connect your Mac to your TV and enjoy a better viewing experience.
The exact steps might change based on your Mac and TV models. But this guide should help you get started. If you run into problems, check your device manuals or look up online troubleshooting tips.
Understanding the Different Connection Options
Connecting your Mac to a TV offers several options. You can use HDMI cables or Thunderbolt or Mini DisplayPort. Each has its own benefits, so let’s dive into them.
HDMI Cable
HDMI is a top pick for Mac to TV connections. It carries both video and audio, ensuring high-quality visuals and sound. HDMI works with many devices, making it easy to use.
Thunderbolt or Mini DisplayPort
Thunderbolt and Mini DisplayPort are also good choices. They’re found on newer Macs and offer fast video and audio transfer. They support up to 4K resolution, perfect for clear displays.
When picking a connection, think about your Mac and TV’s ports. Also, consider the display resolution and performance you need. Each option has its perks, so choose wisely for the best viewing experience.
| Connection Type | Supported Resolutions | Video and Audio Transmission | Compatibility |
|---|---|---|---|
| HDMI | Up to 4K | Yes | Widely supported |
| Thunderbolt | Up to 4K | Yes | Newer Mac models |
| Mini DisplayPort | Up to 4K | Yes | Newer Mac models |
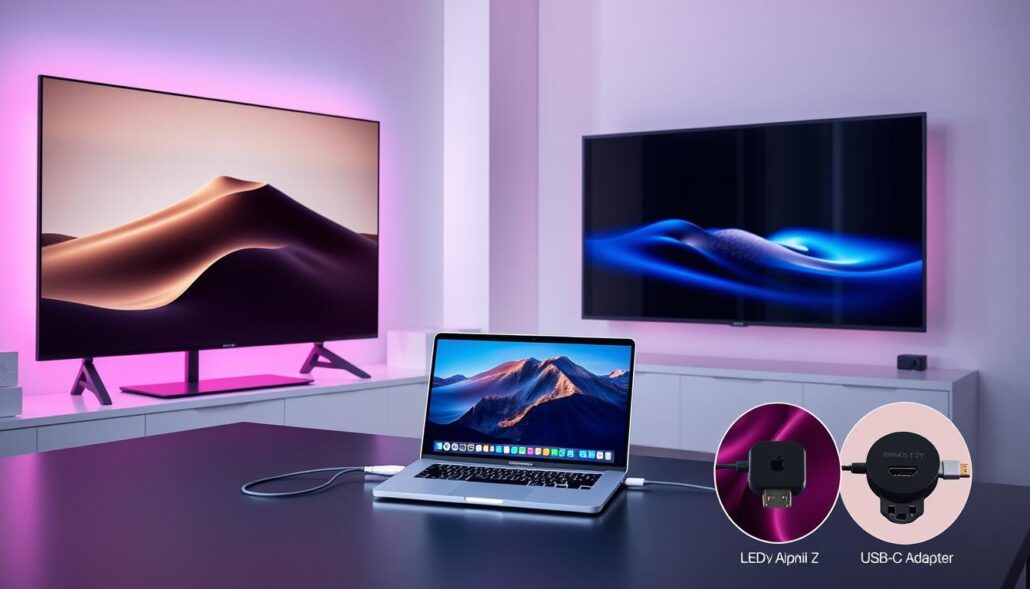
“Choosing the right connection type for your Mac and TV setup is crucial for a seamless viewing experience.”
Preparing Your Mac and TV for Connectivity
Before you can connect your Mac to your TV, there are a few essential steps. These steps ensure a smooth setup process. You’ll get a reliable and high-quality connection between your devices.
Let’s look at the key things to consider for preparing your Mac and TV for the connection:
- Compatibility Check: Make sure your Mac and TV have compatible ports. You might need HDMI, Thunderbolt, or Mini DisplayPort. Check that both devices have the right ports for a direct connection.
- Software Updates: Keep your Mac’s operating system and software current. This ensures compatibility with the latest display tech. It also gives you access to the necessary drivers and utilities for a smooth connection.
- TV Input Selection: Learn how to choose the right input on your TV. Most modern TVs have multiple HDMI ports. You’ll need to pick the right input to get the signal from your Mac.
- Display Settings: Adjust your Mac’s display settings to match your TV’s native resolution and aspect ratio. This improves visual quality and ensures a seamless viewing experience.
By following these preparatory steps for connecting your Mac to your TV, you’re ready for a successful setup. With the right ports, updated software, and display settings, you’ll enjoy using your Mac’s content on the big screen.
| Preparation Step | Action |
|---|---|
| Compatibility Check | Verify compatible ports between Mac and TV |
| Software Updates | Keep Mac’s OS and relevant software up-to-date |
| TV Input Selection | Familiarize with TV’s input selection process |
| Display Settings | Adjust Mac’s display settings to match TV’s resolution and aspect ratio |
By following these preparatory steps for connecting your Mac to your TV, you’re ready for a seamless and enjoyable viewing experience.
Using an HDMI Cable to Connect Your Mac to TV
Connecting your Mac to a TV with an HDMI cable is easy. It opens up a world of entertainment and work options. Let’s go through the steps to link your Mac and TV smoothly.
Connecting the HDMI Cable
First, find the HDMI port on your Mac. It’s usually on the side or back. Plug one end of the HDMI cable into it.
Then, connect the other end to your TV’s HDMI port.
Configuring Display Settings
After connecting, set up your display settings. Go to System Preferences and choose “Displays”. Here, you can adjust resolution and aspect ratio for the best image on your TV.
If display settings are tricky, try different options. Aim for a seamless viewing experience.
| Step | Action |
|---|---|
| 1 | Locate the HDMI port on your Mac |
| 2 | Plug one end of the HDMI cable into the Mac’s HDMI port |
| 3 | Connect the other end of the HDMI cable to the HDMI port on your TV |
| 4 | Navigate to the System Preferences menu and select “Displays” |
| 5 | Adjust the resolution, aspect ratio, and other display settings to optimize the image quality |
By following these steps, you can connect your Mac to your TV with an HDMI cable. You’ll get the best viewing experience. Enjoy mirroring your Mac’s screen or expanding your workspace on the big screen.
Mirroring or Extending Your Mac’s Display
After connecting your Mac to your TV, you have two main display options: mirroring and extending. Mirroring shows the same thing on both screens. Extending lets you use your TV as an extra workspace, making your desktop bigger.
To mirror your Mac’s display on the TV, go to System Preferences on your Mac. Then, select “Displays” and check the “Mirror Displays” box. This makes the content on both screens the same. It’s perfect for sharing your Mac’s screen, like during presentations or movie nights.
Extending your Mac’s display is great for being more productive. By choosing “Extend Displays” in the Displays settings, you can use the TV as a second monitor. This gives you more space to work, letting you open more windows and apps.
Choose the display mode that fits your needs best. Whether you’re mirroring for a shared view or extending for more space, it’s easy to switch. This can really improve your Mac-to-TV setup.
“Mirroring and extending your Mac’s display can be a game-changer, allowing you to adapt your setup to any situation.”
The choice between mirroring and extending depends on what you need. Try both to see which one works best for you. It can help you be more productive and enjoy your Mac-to-TV setup more.
Connecting Your Mac to a Smart TV
Technology keeps getting better, making it easier to connect your Mac to a smart TV. You can share your screen, stream media, or just make your workspace bigger. Connecting your Mac and smart TV wirelessly is now simple.
Wireless Screen Mirroring
Wireless screen mirroring is a top choice for linking your Mac to a smart TV. It lets you show what’s on your Mac’s screen on your TV. This is great for sharing photos, watching movies, or showing off presentations.
First, make sure your Mac and TV are on the same Wi-Fi. Then, find the screen mirroring or AirPlay option on your TV’s menu. Pick it, and your Mac’s screen will show up on the TV.
Mac wireless screen mirroring is easy and handy. You can switch between your Mac and TV quickly. This is perfect for presentations, movie nights, or sharing with others.
Connecting your mac to smart tv is simple. Just follow a few steps. With mac screen share on smart tv, you open up new ways to connect and enjoy.
“The ability to connect my Mac to my smart TV has completely transformed the way I work and entertain at home. It’s a game-changer!”
Troubleshooting Common Connection Issues
Connecting your Mac to a TV can sometimes be frustrating. You might face issues like no display, audio problems, or compatibility challenges. But don’t worry, I’ve got some practical tips to help you fix these common problems.
First, make sure your HDMI cable is securely connected to both your Mac and TV. Gently wiggle the cables to ensure they fit well. If the first HDMI port doesn’t work, try another one on your TV. If problems persist, swap the HDMI cable to check if it’s the issue.
- Check that your TV is set to the correct input source, such as HDMI1 or HDMI2.
- Ensure that your Mac’s display settings are configured correctly, with the appropriate resolution and aspect ratio for your TV.
- If you’re encountering audio issues, verify that the audio output on your Mac is set to the connected TV.
Compatibility issues can sometimes occur between your Mac and TV. Older TVs or those with limited HDMI port capabilities may not be able to handle the latest display resolutions or features. If this is the case, you might need to upgrade your TV or find another way to connect, like using a Thunderbolt or Mini DisplayPort adapter.
“Troubleshooting connectivity issues can be a hassle, but with a little patience and the right troubleshooting steps, you can usually get your Mac and TV working together seamlessly.”
By following these tips, you’ll be well on your way to resolving mac tv connectivity problems, fixing mac tv display issues, and troubleshooting mac to tv connection successfully. Stay persistent, and don’t hesitate to reach out for additional support if needed.
Optimizing Your Mac’s Display on the TV
Connecting your Mac to a TV requires adjusting display settings for the best viewing. I’ll show you how to optimize your Mac’s display for TV viewing. This includes adjusting resolution and setting the correct aspect ratio.
Adjusting Resolution and Aspect Ratio
Start by adjusting the resolution. The right resolution ensures the image on the TV is crisp and clear. You might need to try different resolutions to find the best one for your TV.
Then, set the correct aspect ratio. The aspect ratio is the width to height ratio of the display. Matching your Mac’s aspect ratio to the TV’s can prevent distortion. Modern TVs support various aspect ratios, so you might need to experiment to find the best one.




Leave a Reply