In today’s world, we all need safe and reliable storage. This is true for both personal and small business needs. Network Attached Storage (NAS) servers are becoming more popular. In this guide, I’ll show you how to set up a Linux NAS using Ubuntu.
By the end of this article, you’ll have a Linux NAS server ready to use. It will have network access, file sharing, and more. Let’s start exploring the world of Linux NAS!
Key Takeaways
- Learn the benefits of setting up a Linux NAS server and the advantages of using Ubuntu as the operating system.
- Understand the hardware and software requirements for building a reliable Linux NAS.
- Discover the step-by-step process of installing and configuring Ubuntu on your NAS server.
- Explore techniques for managing storage, setting up network access, and enabling file sharing capabilities.
- Gain insights into advanced NAS configuration and maintenance, including backups and disaster recovery.
What is a Linux NAS and Why Should You Set One Up?
A Network Attached Storage (NAS) server is a special computer for storing data. It’s great for homes and small businesses because it’s easy to use. It lets you share files and keep your data safe.
Understanding the Benefits of a Network Attached Storage (NAS) Server
Setting up a NAS with Linux, like Ubuntu, has many benefits. Linux is free, customizable, and uses less resources. This makes it a smart choice for a NAS server.
Linux also has lots of software for storage and networking. This lets you make your NAS setup do more and be more flexible.
Advantages of Using Linux for Your NAS Setup
Using Linux for your NAS setup has several advantages:
- It’s open-source and customizable
- It’s more efficient than commercial options
- It has a huge range of software for storage and networking
- It gives you more control over your NAS system
With Linux, you can make a NAS server that fits your needs. It’s a cost-effective and versatile storage solution for your home or business.
“A NAS simplifies the set-up process for a home server by offering graphical interfaces and one-click installable solutions for various functionalities.”
| NAS Benefits | Network Storage Advantages |
|---|---|
| Increased storage capacity | Improved data backup and redundancy |
| Easy file sharing across devices | Cost-effective and flexible solution |
Prerequisites for Setting Up a Linux NAS
Before you start setting up a Linux NAS server, make sure you have the right hardware and software. This guide will help you prepare for your NAS project.
Hardware Requirements
You’ll need a computer or a single-board computer like a Raspberry Pi. Also, you’ll need storage drives and a network interface. You might also want a more powerful CPU, more RAM, and a RAID controller for extra security.
The specific hardware you need depends on your storage needs, the number of users, and how fast you want it to be. For a NAS for 1-4 users, you’ll need a CPU with at least 2.0GHz, 2GB of RAM, and an 8GB flash drive or SSD for the OS.
Software Requirements
You’ll need to install a Linux distribution, like Ubuntu Server, on your hardware. Ubuntu is great because it’s easy to use, has lots of support, and lots of packages. You’ll also need to install packages for file sharing, management, and maybe backup or media server software.
Think about using Webmin or Cockpit for easier system management. You might also want NFS server for file sharing, vsftpd for better file transfers, and Plex Media Server for streaming media.
With the right hardware and software, you’re ready to set up a strong and reliable Linux NAS server. It will meet your storage and network needs.
Installing Linux Ubuntu on Your NAS Server
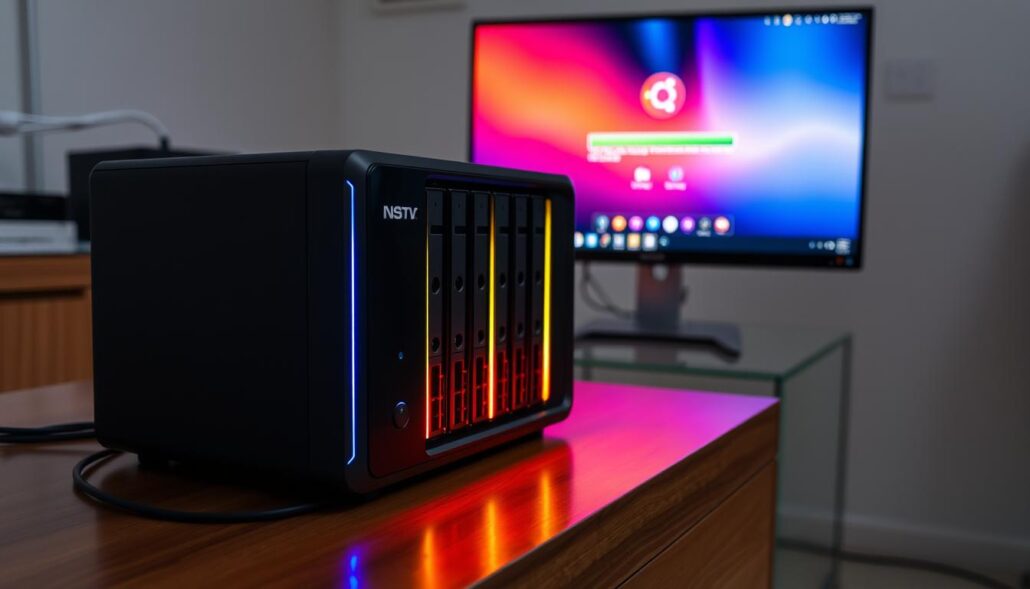
To start your Linux NAS, first install Ubuntu on your chosen hardware. Download the Ubuntu ISO, make a bootable USB with Rufus, and boot from it. The setup is easy, covering drive partitioning, user creation, and network setup. After, you’ll have a ready Ubuntu NAS server.
For a smooth NAS server OS setup, follow these steps:
- Get the latest Ubuntu Server from the official site.
- Make a bootable USB with Rufus from the ISO.
- Plug in the USB and boot to start the install.
- Follow the prompts to set up drives, create a user, and network settings.
- After, you’ll have a fresh Ubuntu system for your NAS.
By doing these steps, you can easily install Ubuntu on your NAS. This is the first step to a powerful and reliable storage solution.
| Recommended NAS Solutions | Popularity | Ease of Use | Performance |
|---|---|---|---|
| Unraid | High | Moderate | High |
| TrueNAS | High | High | High |
| OpenMediaVault | Moderate | High | Moderate |
“Samba is a reliable and easy-to-use solution for setting up a NAS on Ubuntu, as it’s supported by most operating systems.”
By following these steps, you can successfully install Ubuntu on your NAS server. This will create a powerful network-attached storage solution tailored to your needs.
Configuring Your Linux NAS Server
After setting up your Ubuntu-based NAS server, it’s time to make it work its best. You’ll need to update the system and install the right software packages.
Updating the System and Installing Required Packages
To keep your Ubuntu NAS safe and up-to-date, start with system updates. Open the terminal and use these commands:
- sudo apt-get update
- sudo apt-get upgrade
Then, install the packages you need for your Linux NAS software. This includes Samba for sharing files and SSH for remote access. Use this command to install them:
- sudo apt-get install samba ssh
Setting Up a Static IP Address
Having a static IP address makes your NAS server setup more reliable. It keeps your server’s network identity consistent. You’ll need to edit your network settings to set up a static IP.
This lets you easily find and manage your Linux NAS IP configuration from other devices. It also helps with port forwarding and firewall rules.
To set up a static IP on your Ubuntu NAS network setup, follow these steps:
-
- Open the network configuration file:
sudo nano /etc/netplan/00-installer-config.yaml - Change the file to include your static IP settings, like this:
- Open the network configuration file:
network:
version: 2
renderer: networkd
ethernets:
ens33:
dhcp4: no
addresses:
- 192.168.1.100/24
gateway4: 192.168.1.1
nameservers:
addresses: [8.8.8.8, 8.8.4.4]- Save the file and exit the text editor.
- Apply the changes:
sudo netplan apply
Now, your Ubuntu NAS is ready for more tweaks and integration into your network.
Setting Up a Linux NAS: A Complete Guide
Setting up a Linux NAS server is rewarding. It gives you a secure and reliable place to store data at home or in a small office. We’ll show you how to set up a Linux NAS using Ubuntu.
NAS devices are easy to set up. They come with wizards to help you get started. The time it takes to set up a NAS depends on what you want to do. But, it’s usually simple.
You’ll need the right hardware and software to start. Choose a NAS like the TerraMaster F4-423. It has a good processor and lots of RAM. Then, install Ubuntu Server on the NAS.
- Start by downloading the Ubuntu Server 22.04.4 LTS ISO and putting it on a USB drive.
- Install Ubuntu Server on the NAS’s NVMe SSD. Choose the btrfs file system format.
- Set up the NAS with important software. This includes an OpenSSH server for remote access and xrdp for graphical access.
- Use fdisk, mkfs, and mount to set up file storage.
- Make Samba work so you can share files with Windows clients.
- Use RAID for data safety and better performance. Choose NTFS for file names.
By following these steps, you’ll have a working Linux NAS server. Make sure to think about network, temperature, and power for the best performance.
With a Linux NAS, you can manage data better. You can use user permissions and folder structures. Also, check out the NAS’s package center for more apps.
Configuring Storage and RAID on Your Linux NAS
Setting up storage and RAID on your Linux NAS is key to a reliable data system. You’ll need to pick RAID options, create volumes, and manage access. This ensures your NAS fits your needs perfectly.
Choosing the Right RAID Configuration
First, you must choose a RAID setup for your Linux NAS. You’ve picked a RAID 6 setup with five Toshiba Enterprise MG08ACA16TE HDDs. This gives you 48 TB of usable space. RAID 6 balances data safety and storage, protecting against up to two disk failures.
You’ve chosen not to add a spare disk for cost reasons. Instead, you’ll watch your disks closely and replace any failing ones.
Configuring Volumes and Access Permissions
Now, you’ll set up storage volumes and access permissions. Decide who can read and write to your NAS’s shared folders. This step is crucial for keeping your data safe and secure.
| RAID Level | Usable Capacity | Disk Requirement | Spare Disk |
|---|---|---|---|
| RAID 6 | 48 TB | 5 x Toshiba Enterprise MG08ACA16TE HDDs | Not included |
By carefully setting up your storage and RAID, you’re building a strong Linux NAS. It will manage your data storage needs well.
Enabling Network Access and File Sharing
To share data on your Linux NAS server with other devices, you need to set up file-sharing services. Samba is a top choice because it works well with Windows networks. It lets users on Windows, macOS, and Linux access your NAS’s shared folders.
Configuring Samba for Windows Networking
Setting up Samba involves several steps. You’ll need to create user accounts, define shared folders, and set permissions for secure access. Here’s how to do it:
-
- First, install the Samba package on your Linux NAS server:
sudo apt-get install samba
-
- Then, edit the Samba configuration file at
/etc/samba/smb.conf. Here, you’ll set up your shared folders and user permissions. - Create Samba user accounts for each user needing access to your shared folders:
- Then, edit the Samba configuration file at
sudo smbpasswd -a username
-
- Finally, restart the Samba service to make the changes work:
sudo systemctl restart smbd
After these steps, your Linux NAS server will be ready for NAS file sharing with the Linux NAS Samba protocol. This means easy NAS network access from Windows, macOS, and Linux devices on your network.
| Benefit | Description |
|---|---|
| Cross-platform compatibility | Samba makes it easy to share files between Windows, macOS, and Linux systems. This ensures smooth access to your NAS data. |
| Secure access control | You can manage who can access and change your shared folders on the NAS. This is done through user accounts and permissions. |
| Simplified management | Samba’s integration with Windows networking makes it simple for users to connect to and manage your NAS’s shared folders. |
Advanced Configuration and Maintenance
Setting up your Linux NAS is just the start. You can add more features to make it better and more reliable. For example, you can set up NAS alerts and notifications to stay updated on your NAS’s health. This includes alerts for disk failures, network problems, or other critical issues.
Many Linux NAS monitoring tools have built-in alert systems. They send emails or push notifications when there’s a problem. This way, you can fix issues quickly.
To protect your data, it’s key to have a good NAS backup plan. You can back up to external devices, cloud services, or even a second NAS for NAS disaster recovery. Regular backups mean your files are safe, even if something goes wrong.
Configuring Notifications and Alerts
Good NAS server management means keeping an eye on your NAS and getting alerts. Many NAS systems have tools to set up these notifications. You can get:
- Emails for big issues like disk failures or network problems
- Push notifications on your phone for quick alerts
- System log monitoring for tracking errors and warnings
- SNMP traps for working with network management software
Setting Up Backups and Disaster Recovery
Keeping your data safe is a big part of NAS server management. A solid backup plan is essential. It helps protect your files and ensures you can recover if something goes wrong. Good backup options include:
- Regular backups to external drives or other NAS devices
- Cloud-based backups for extra protection
- Mirroring your data to a second NAS for safety
- Automated backup scripts or tools for easy protection
By setting up strong alerts and a reliable backup plan, your Linux NAS is ready for any challenge. Your data will stay safe and easy to access.
Conclusion
By following this guide, you’ve set up a Linux NAS server using Ubuntu. You’ve learned about the benefits of a NAS and what you need to get started. You also know how to install and configure it, and how to manage your data.
With your new NAS, you can store files in one place, share them easily, and back up your data. This is great for both your home and small business. A Linux NAS is flexible and can be customized to fit your needs.
Remember, a Linux NAS is a powerful and affordable way to store your data. This guide has shown you how to create a strong and reliable storage system. It’s a great way to improve your digital life and protect your data.




Leave a Reply