I’ve always been excited about building my own media server. I wanted something quiet, energy-efficient, and versatile. This guide will show you how to set up a powerful Linux media server.
Setting up a Linux media server is easier than ever, thanks to modern Linux distributions. You’ll learn to pick the right hardware, install Ubuntu, and set up Plex and Sonarr/Radarr. Your media server will be ready to stream your collection across your network.
Key Takeaways
- Learn how to choose the right hardware components for your Linux media server
- Discover the benefits of a centralized media server and the key requirements to build a powerful one
- Follow a step-by-step guide to install Ubuntu and configure your media server
- Explore the installation and setup of popular media server software like Plex and Sonarr/Radarr
- Optimize and maintain your Linux media server for seamless performance and reliability
What is a Media Server and Why Do You Need One?
A media server is a system that keeps all your digital media in one place. It lets you stream your movies, TV shows, music, and photos to any device in your home. This makes it easy to enjoy your favorite content from anywhere.
Benefits of a Central Media Server
- Consolidated media access: All your digital media is in one spot, making it simple to find and play your favorite content on any device.
- Reduced clutter and duplication: You don’t need multiple devices or storage units around your home. A media server keeps everything organized in one system.
- Seamless streaming across devices: You can stream your content to many devices, like smart TVs, tablets, and laptops. This ensures a smooth viewing experience everywhere in your home.
Requirements for a Powerful Media Server
To make a strong media server, you need certain components. These include a fast processor, lots of storage, and efficient power use. Choosing the right hardware and software helps you create a server that meets your needs and offers great streaming.
How to Set Up a Linux Media Server
Setting up a Linux media server is a step-by-step process. It helps you create a system that’s powerful, customizable, and reliable. Here’s a guide to help you start your media server journey:
- Choose the right hardware components: Pick a CPU for media transcoding, enough storage, and RAM for your media and apps.
- Assemble the components: Put the hardware together to make the server.
- Install Ubuntu: Get the installation media ready and install Ubuntu on the server.
- Configure the server: Set up user accounts, permissions, and network settings for secure access.
- Install essential software applications: Add Plex Media Server, Sonarr, Radarr, and more to manage and stream your media.
To make setup easier, use DockSTARTer. It lets you set up a Linux media server with media software in under an hour. DockSTARTer, powered by Docker, makes adding new apps to your server quick and easy.
| Benefit | Description |
|---|---|
| Rapid Setup | DockSTARTer can help you set up a Linux media server with media software in less than an hour. |
| Flexible Deployment | Docker, used with DockSTARTer, allows you to install new applications quickly on the server, supporting various Linux distributions (excluding Arch). |
| Secure Environment | Docker containers provide a secure environment for running different software independently from the main system. |
| Comprehensive Software | DockSTARTer enables the configuration and installation of a wide range of media applications, including Plex, Emby, Airsonic, CouchPotato, Deluge, Sonarr, and HTPC Manager. |
| Ongoing Maintenance | Ouroboros and Portainer apps are suggested for Docker maintenance after the DockSTARTer setup. |
By following these steps and using DockSTARTer, you can efficiently build a linux media server and set up a linux media server that meets your media needs.
Choosing the Right Components
Building a strong Linux media server means picking the right parts. You need a good processor, storage, and RAM. Each part is key to making your server run well and give you a great media experience.
Processor
The CPU is the heart of your media server. It must handle tasks like media transcoding, which takes a lot of work. Choose a processor with lots of cores, like the latest Intel Core i3 or i5, for smooth playback and quick media processing.
Storage
Storage space is very important for a media server. You need enough room for your growing media collection. Also, look for drives that can save energy by spinning down when not in use. A mix of SSDs for the OS and HDDs for media is best. Western Digital’s Red series drives are great for media servers.
RAM
Having enough RAM is crucial for your media server’s performance. We suggest at least 16GB of RAM. But, if you stream a lot of media at once, you might need 32GB or more.
| Component | Recommendation |
|---|---|
| Processor | Intel Core i3 or i5 (12th gen or newer) |
| Storage |
|
| RAM | 16GB or more |
By picking the best parts for your Linux media server, you’ll get a system that’s fast, saves energy, and is reliable. It will be perfect for storing and streaming your media.
Assembling the Components
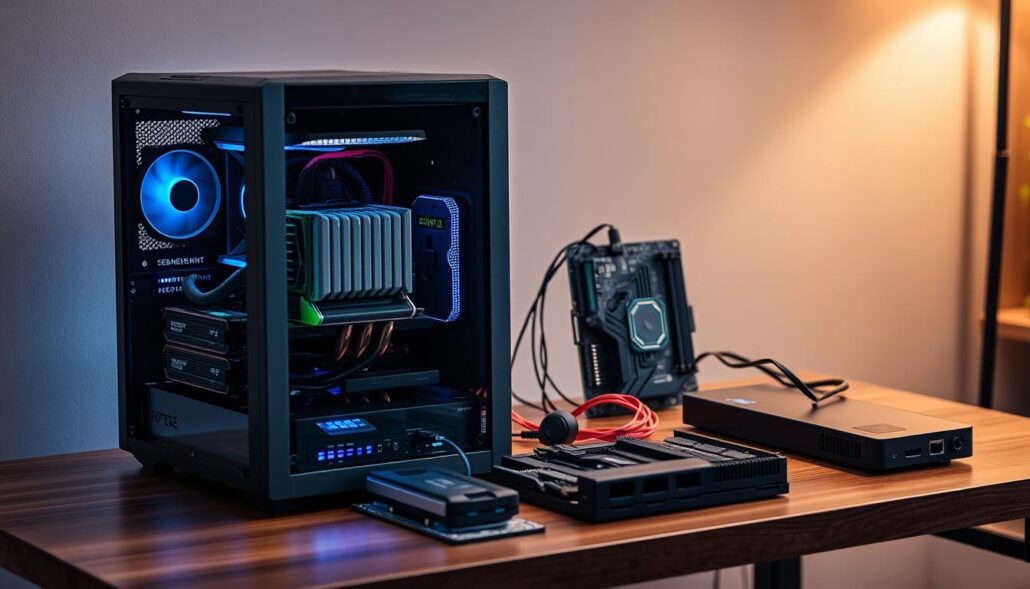
Building a Linux media server starts with putting together the right hardware. First, you need to install the CPU into the motherboard. It’s important to use a good heatsink and fan to keep it cool and running well.
Next, add the memory modules, or RAM, into the motherboard’s slots. How much RAM you need depends on how many streams you want to handle at once.
Then, install the storage drives, like hard disk drives (HDDs) and solid-state drives (SSDs), into the server case. Make sure to manage cables well and keep the system cool for better performance.
If your server needs extra parts, like a network card or graphics card, install them too. Properly connecting all cables helps keep the system tidy and improves airflow.
Finally, put the server in its case or rack and connect the power supply unit (PSU). Choose a PSU that can handle the server’s power needs and supports future upgrades.
By carefully putting together the hardware, you’re setting up a solid Linux media server. It will be ready to store and stream your media smoothly.
| Component | Recommended Specifications |
|---|---|
| Processor (CPU) | Intel Core i5 or AMD Ryzen 5 series, or higher |
| RAM | 8GB or more, DDR4 preferred |
| Storage | 1TB or more, mix of HDD and SSD for optimal performance |
| Network Interface Card (NIC) | Gigabit Ethernet or faster |
| Power Supply Unit (PSU) | Minimum 500W, 80+ Bronze or higher efficiency |
By following these steps, you can build your own Linux media server. This will help you move on to installing and setting up the software next.
Installing Ubuntu
To set up a powerful Linux media server, we’ll use Ubuntu. Ubuntu is popular and easy to use. It’s stable, secure, and has lots of software for media servers.
Preparing the Installation Media
The first step is to make a bootable Ubuntu installation media. You can use a USB drive or a DVD. Download the latest Ubuntu Server ISO from the official website. Then, use Rufus or balenaEtcher to make the media bootable.
- Download the Ubuntu Server ISO from the official website.
- Use a tool like Rufus or balenaEtcher to create a bootable USB drive or DVD with the Ubuntu ISO image.
- Ensure the bootable media is properly configured and ready for the installation process.
Installing Ubuntu on the Server
Now, prepare the Ubuntu media. Then, install the operating system on your media server. Here’s how:
- Insert the bootable Ubuntu media into the server.
- Boot the server from the Ubuntu installation media.
- Follow the on-screen prompts to guide you through the installation process, including setting up the network, disk partitioning, and user account creation.
- Once the installation is complete, the server will reboot, and you’ll be ready to configure your Ubuntu media server setup.
By installing Ubuntu, you’re creating a reliable and flexible media server. It can handle many media management and streaming tasks. Next, we’ll focus on configuring the server for your needs.
Configuring the Server
After installing Ubuntu, it’s time to set up your server. You’ll need to create user accounts and set permissions. This controls who can access your media library. You’ll also need to configure network settings for easy access at home and maybe from afar.
Setting Up Users and Permissions
To manage who can use your media server, create user accounts and set their permissions. This way, only those you trust can see and use your media. Here’s how to do it:
- Create user accounts for everyone who will use the media server.
- Give each user the right to access certain folders and files.
- Keep an eye on and update user permissions to keep your media safe.
Configuring Network Settings
Now, set up your media server’s network settings. This means giving it a static IP address for easy access. You might also want to set up remote access. Here’s what to do:
- Give your media server a static IP address for easy access at home.
- Set up port forwarding on your router for remote access, if you want it.
- Make your server safe by turning on the firewall and stopping services you don’t need.
By following these steps, you can configure a linux media server well. You’ll set up media server user and permission controls and optimize the media server network settings. This will make your home media hub reliable and easy to use.
| Specification | Recommendation |
|---|---|
| Minimum RAM | 4GB |
| Recommended RAM | 8GB or more |
| Storage | SSD for faster access, HDD for larger capacity |
| Operating System | Ubuntu Server |
Installing Software Applications
To make your Ubuntu media server powerful, you need to install key software. Plex Media Server helps you organize and stream your media. Sonarr and Radarr automatically download TV shows and movies, making your server even better.
Plex Media Server
Plex Media Server is great for a media server on Linux. It’s easy to use and lets you stream to many devices. Here’s how to set it up:
- Get the Plex Media Server package from the Plex website.
- Use
aptorsnapto install it. - Make media libraries for your videos, music, and photos. Tell Plex to watch these folders.
- Change server settings like transcoding and remote access to fit your needs.
Sonarr and Radarr
Adding sonarr and radarr linux installation boosts your server. Sonarr manages TV shows, and Radarr handles movies.
- Get Sonarr and Radarr from your package manager or their websites.
- Set them to watch your media folders. Choose your download client and tweak settings.
- Link Sonarr and Radarr with Plex for easy TV and movie streaming.
With plex media server linux setup and sonarr and radarr linux installation, your server will manage media well. It will also stream smoothly to all your devices.
How to Set Up a Linux Media Server
Setting up a Linux media server is a fun project. It lets you keep all your media in one place and stream it everywhere in your home. This guide will help you set up a strong and reliable media server. You’ll learn how to pick the right hardware and install the software.
Hardware Selection
Choosing the right hardware is key for a good media server. Look for a processor with lots of cores and threads for smooth media handling. You’ll also need enough storage for your media and plenty of RAM for fast playback.
Ubuntu Server Installation
First, install Ubuntu Server 20.04 LTS on your media server hardware. This version of Ubuntu is stable and has lots of features for media servers. Make sure to enable OpenSSH server during setup for easy remote access.
Software Configuration
- Install Plex Media Server, a great app for organizing and streaming your media. It works well with many devices.
- Set up Plex’s options, like automatic library updates and remote access. This makes it easy to watch your media from anywhere.
- Check out Sonarr and Radarr for automating TV show and movie downloads. They make managing your media easier.
By following this step-by-step guide to setting up a Linux media server, you can make a central media hub. This makes streaming your media easy and fun in your home.
“A well-designed media server can transform the way you enjoy and manage your digital content at home.”
Optimizing the Media Server
To get the most out of your Linux media server, you need to tweak a few settings. This means adjusting transcoding settings for smooth playback on various devices. Also, setting up remote access lets you stream media from anywhere, not just at home.
Transcoding Settings
Transcoding changes media formats for better playback on different devices. Making the right transcoding settings boosts your streaming quality and efficiency. Here are some tips:
- Look at your media collection and the devices you’ll use. Choose the best codec and bitrate for quality and compatibility.
- Think about your server’s power. Better transcoding needs more CPU, so find a balance between quality and performance.
- Try different settings to find the perfect mix of file size, quality, and server load. Watch your server’s performance and adjust as needed.
Remote Access Configuration
Remote access lets you stream media from anywhere, making it super convenient. Here’s how to set it up:
- Make sure your server is reachable from the internet by setting up port forwarding on your router.
- Use a secure connection like a VPN to keep your server and data safe from hackers.
- Check out your media server software’s remote access features. They might include user login, device control, and bandwidth settings.
- Test your remote access setup well to ensure smooth streaming and keep your server secure.
By tweaking transcoding and remote access settings, you can make your media server better. This means better playback quality and easy access to your content from anywhere.
| Transcoding Settings | Remote Access Configuration |
|---|---|
|
|
By optimizing your media server’s transcoding and remote access, you can enhance your home media experience. This ensures high-quality playback and easy access to your digital content from anywhere.
Maintaining and Updating the Server
Keeping your Linux media server in top shape is key. Regular updates and maintenance ensure it works well for years. This keeps your media server up to the task.
One important step is to keep your operating system current. Distributions like Ubuntu LTS make this easy, with updates done automatically. But, distributions like Debian stable might need more manual updates.
- Make sure security updates are installed automatically for a safe system.
- Choose a long-term support (LTS) version of Ubuntu for a stable system.
- Always apply system updates to keep your server secure and current.
It’s also vital to update the software on your server. Apps like Plex and Emby need updates for the latest features and compatibility.
- Enable automatic updates for your media server apps when you can.
- Install any updates for your apps to keep your server running smoothly.
- Use a secure method like SSH for remote access and file transfers.
By focusing on maintenance and updates, your Linux media server will keep delivering great entertainment. A well-kept server means a better viewing experience for everyone at home.
Conclusion
Setting up a Linux media server is rewarding and empowering. It lets you manage your digital media collection easily. You can stream media smoothly across your home.
By following this guide, you can create a media server that fits your needs. The right hardware and software make it a central hub for your entertainment. It’s flexible and reliable for years.
A good Linux media server offers many benefits. It supports different file formats and has smart playlists. It also works well with popular media players.
Setting up and keeping the server might seem hard at first. But with the right help and patience, you can make a powerful media hub. It will make your home entertainment better.
Whether you’re tech-savvy or new to media servers, this article helps. It gives you the confidence and tools to start your Linux media server journey. As you improve your setup, stay open to new ideas. The media server world keeps changing.
With your Linux media server ready, you’ll enjoy easy access to your media. It’s all at your fingertips, ready for you to enjoy.



Leave a Reply